Freezing is a quick, convenient, and easy method of preserving foods in the home. Frozen foods are easy to serve because most of the preparation is done before freezing. Freezing preserves nutritive quality so that frozen foods resemble fresh foods.
Successful Freezing
The five factors that are responsible for most of the quality losses of frozen foods are enzymes, air, microorganisms, large ice crystals, and evaporation of moisture.
Enzymes and Blanching
Enzymes are naturally occurring substances in plants that control the ripening process. Freezing only slows enzyme activity. Most frozen vegetables will lose quality in the freezer unless they have been blanched.
Why Blanch Vegetables?
- To improve flavor, color, texture, and nutrient retention
- To slow or stop the action of enzymes in the ripening process
- To cleanse the surface of dirt and organisms
- To brighten the color of green vegetables
- To wilt or soften vegetables, making it easier to fill containers
Correct blanching time is critical in having a quality product. Refer to the blanching directions in this fact sheet. Most vegetables are blanched in boiling water. Steam blanching normally takes 50 percent more time than water blanching and is ideal for delicate vegetables.
Air
Exclusion of air from the food prevents enzyme reactions and oxidation, which causes surface browning. This problem is more common in fruits, but some vegetables, such as potatoes, are also affected.
Microorganisms
Bacteria, molds, and yeast are present on all fresh foods and multiply rapidly when the temperature is between 40°F and 140°F. Unlike canning, freezing does not kill most microorganisms in food, but it does prevent their growth if the food is held at 0°F or lower. When thawed, the surviving organisms can grow again. This is why proper handling and preparation techniques are essential.
Ice Crystals—Freeze Quickly
Small ice crystals are desirable in frozen food to preserve its texture. Large ice crystals rupture food cells and cause a soft, mushy texture. Small crystals are formed when food is frozen quickly and kept at a constant storage temperature of 0°F or lower. Avoid adding more than 2 pounds of frozen food per square foot of freezer space because a larger volume of food will slow the freezing process and may raise the temperature of already frozen food.
Evaporation of Moisture—Packaging Materials
Poor packaging that leaves food unprotected in the freezer allows foods to lose moisture, which will cause a loss of color, flavor, and texture. Long-term exposure to air causes drying of plant fibers, known as freezer burn. Proper packaging materials aid in preventing freezer burn.
Good Packing Materials
- Moisture-vapor resistant
- Durable and leak proof
- Resistant to cracking and brittleness at low temperatures
- Resistant to oil, grease, and water
- Able to protect foods from absorption of off-flavors and odors
- Easy to seal
- Easy to label
Waxed paper, paper cartons, cottage cheese cartons, ice cream and juice cartons, or any rigid carton with cracks or a poorly fitting lid are not suitable for long-term storage. They do not adequately prevent the loss of moisture or the drying out of food from exposure to air.
Tips for Packing Vegetables
- Cool or chill foods before filling them into packages.
- Package foods in quantities that will be used for a single mealsized serving.
- Allow ½ inch of headspace for all types of containers. Vegetables that pack loosely, such as asparagus and broccoli, require no headspace.
- When vegetables are packaged in bags, press the air from the bag.
- Label packages with the name of product, added ingredients (such as salt), date packaged and date to use by, number of servings or quantity, and type of pack (such as whole, sliced, or diced).
- Freeze foods as soon as they are packaged and sealed.
- Do not overload the freezer with unfrozen food.
- Spread unfrozen foods out in the freezer so that they will freeze more rapidly.
Individually Quick Freezing or Tray Freezing
Foods such as cut green beans, peas, whole-kernel corn, and small mixed vegetables are suitable for freezing quickly before being packaged. This allows a partial amount of the food to be poured from containers without being thawed. After vegetables have been blanched, cooled, and drained, place them one layer deep on cookie sheets or shallow trays and freeze uncovered just until solid (4 to 6 hours), then quickly package and seal.
Blanching Directions
- Bring 1 gallon of water to an active boil. Lower 1 pound of vegetables into the water. Cover. Return to a boil. Start counting the blanching time when the water returns to a boil.
- As soon as blanching is complete, vegetables should be cooled quickly in 3 to 4 gallons of cold water.
- Chill at least as long as vegetables were blanched.
- Drain
- Package
Blanching Times
- Asparagus, small spears: 2 minutes
- Asparagus, large spears: 4 minutes
- Green, wax, or Italian beans, small: 2 minutes; large: 3 minutes
- Broccoli, 1½-inch pieces: 3 minutes
- Brussels sprouts, small heads: 3 minutes; large heads: 5 minutes
- Cabbage, quarters: 4 minutes; wedges: 2 minutes; shredded: 1½ minutes
- Carrots, sliced or diced: 2 minutes; whole: 5 minutes
- Cauliflower, small pieces: 3 minutes; large pieces: 5 minutes
- Corn, whole cut kernel or cream style: 4 minutes
- Corn on the cob, small ears: 7 minutes; medium ears: 9 minutes; large ears: 11 minutes
- Okra, small pods: 3 minutes; large pods: 5 minutes
- Mushrooms: Steam whole 5 minutes, buttons or quarters 3 1/2 minutes, slices 3 minutes.
- Peas, black-eyed and green, small: 1½ minutes; large: 2½ minutes
- Sugar peas, small: 2 minutes; large: 3 minutes
- Zucchini or summer squash, ¼- to ½-inch slices: 3 minutes
- Chopped onions and peppers usually don’t need blanching.
Sweet potatoes, pumpkin, spaghetti squash, and tomatoes should be cooked before freezing. Steam blanching normally requires 50 percent more time than water blanching. Steam blanching is less likely to cause water-soaked vegetables and is ideal for broccoli and other delicate vegetables.
If you don’t have a blancher, substitute a colander, sieve, or deep-fryer basket.
Did You Know?
If you have problems with frozen cauliflower turning dark, try blanching it in boiling water that contains 1 Tablespoon lemon juice per quart of water. Cooked tomatoes may be frozen successfully. Raw, whole tomatoes do not freeze well and may become watery and develop an off-flavor after a month in the freezer.
Prepared by Luke LaBorde, associate professor of food science and Martha Zepp, extension project assistant, Penn State Extension
Freezing Spinach
Freezing spinach for later use in casseroles, soups, or smoothies is easy.
Clean spinach very well and removed damaged leaves. Rinse several times. Blanching the spinach retains color and nutrition. First, bring enough water to boil in a large pot to cover spinach. When the water is boiling, submerge spinach in the water to completely cover spinach. As soon as the water boils again, place the lid on the pot and boil for 2 minutes.
Quickly remove spinach to a large blow of cold water or even ice water. Cool completely, about 2-3 minutes. Drain the spinach using a salad spinner, or use a colander and blot the spinach dry with paper towels. (Or try making a sack out of a tea towel and whirl it around so the towel absorbs the water.) Pack 1 cup of spinach per freezer bag. Remove as much air as possible; label seal, and freeze as soon as possible.
Storing Potatoes
Potatoes are best stored in a cool dark place.(They can develop green spots if they are exposed to direct light for an extended amount of time.) Ideally, potatoes should be stored in a cellar, where they can remain for several months at a temperature of 45°F to 50°F. Keeping them at a higher temperature will cause them to shrink and sprout, especially if there is also low humidity. This is because the potato is composed of 80% water, so it evaporates in a hot, dry climate.
Keeping them at a lower temperature, like the fridge, will cause the potato starch to convert to sugar which makes a sweet taste but also causes them to darken very fast when frying. This process can be reversed by leaving them out of the fridge for 7-10 days.
Once raw potatoes are cut open they oxidize rather quickly, this can be temporarily eliminated by putting them directly into a pan of salted water as they are cut.
Once prepared, potatoes should be stored in a tightly closed container to keep out moisture and other contaminants.
Raw potatoes do not freeze well, but french fries are made for the freezer. The best form to freeze is the partially cooked french fry. Although freezing is an indefinite form of storage, potatoes are moist and form ice crystals that eventually take over the bag of french fries.
Best Way to Store Sweet Potatoes
By Whitney DeGroat - eHow Contributor
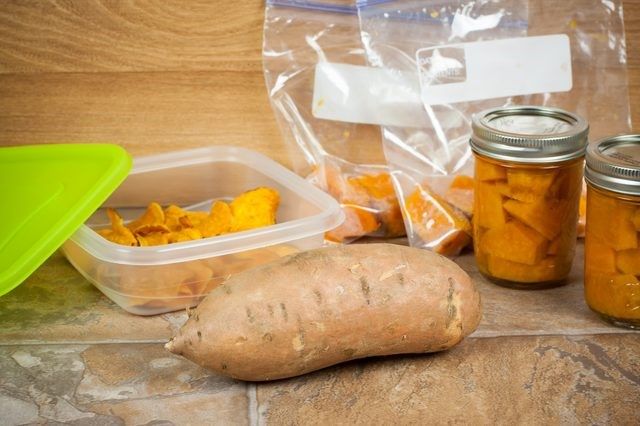
From pressure-canning to freezing and dehydrating, sweet potatoes can be preserved for storage in a variety of ways. Each method comes with its own benefits: frozen sweet potatoes can last several months, while dehydrated sweet potatoes make for a sweet, crunchy snack at any time. Properly storing sweet potatoes helps them retain their flavor and fresh appearance.
(Christian Killian/Demand Media)
Other People Are Reading
- How to Freeze Sweet Potato Casserole
- Can You Freeze Sweet Potatoes After They Have Been Boiled & Mashed?
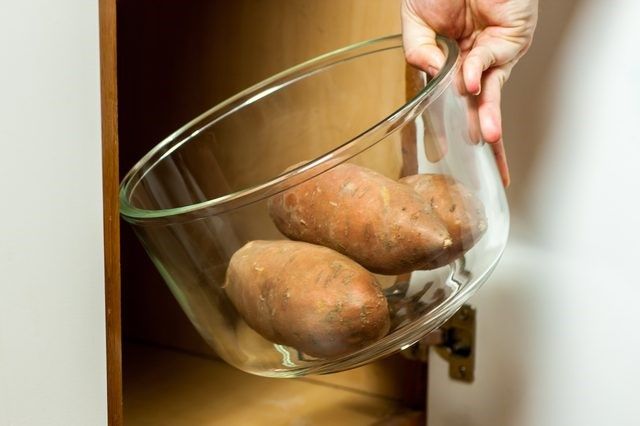
Basic Storage
Store sweet potatoes in a cool, dark place, such as a basement or unheated garage, for up to two weeks. Don't store them in the refrigerator, though, as this can affect their flavor and cause them to decay more quickly. Sweet potatoes are often confused with, or labeled as, yams; however, true yams are grown not in the U.S. but in Africa and Asia, where they are prized for their hardiness. Ranging in size from a few inches to more than 5 feet long, yams can be stored for up to six months provided they’re protected from rain and direct sunlight. Yams are often stored on shelves or in yam barns.
Christian Killian/Demand Media
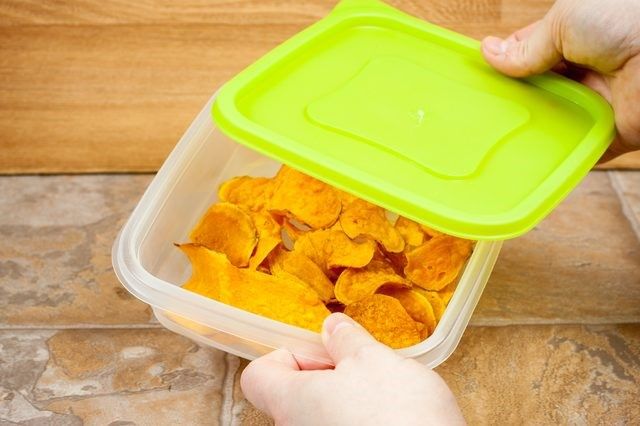
All Dried Up
Dehydration preserves sweet potatoes for storage. You can use this method to turn them into crunchy chips. Sweet potatoes can take from two to 19 hours to dehydrate completely. When the sweet potato is cut, and no moisture appears, the process is complete. Once the sweet potatoes are completely dehydrated, store them in an airtight container in a cool, dry place.
Christian Killian/Demand Media
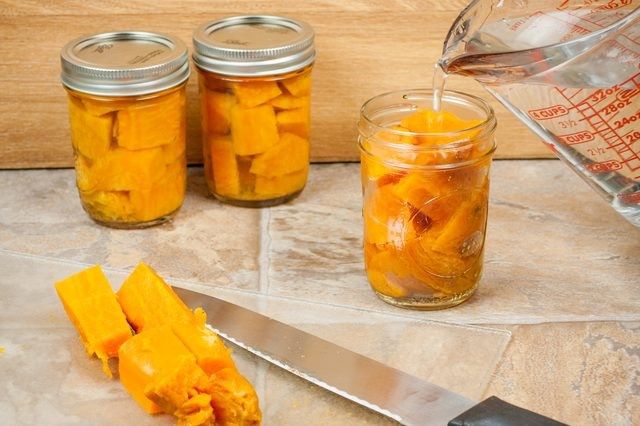
Canning Method
Sweet potatoes can also be pressure-canned for storage. Boil or steam small or medium sweet potatoes for up to 20 minutes, or until they’re soft, then peel off the skins and cut them into uniform chunks. Fill jars with the sweet potatoes but not all the way; leave a 1-inch space at the top. Cover the sweet potatoes with boiling water, taking care to leave the 1-inch space empty. Sweet potatoes should not be dry-packed. In a dual-gauge pressure canner, process the sweet potatoes at 11 pounds of pressure. If you’re using a weighted-gauge pressure canner, process the sweet potatoes at 10 pounds of pressure.
Christian Killian/Demand Media
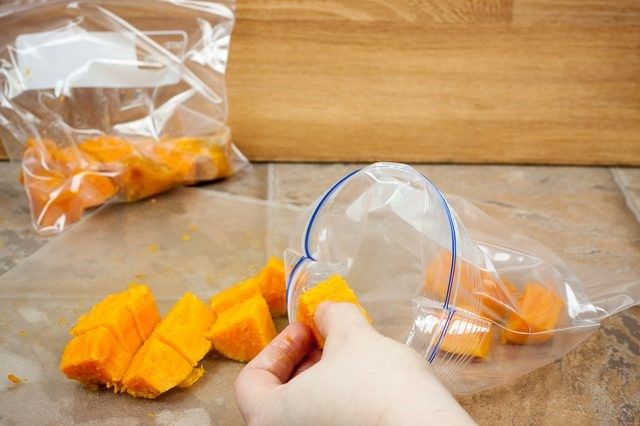
Easy Freeze
Freeze sweet potatoes for prolonged storage. The National Center for Home Food Preservation suggests cooking the sweet potatoes until they’re almost tender, as raw sweet potatoes don’t store well once they’re cut. Then, mash, cut, slice or peel the potatoes. To prevent darkening, add 2 tablespoons of lemon juice to each quart of sweet potatoes; dip the potatoes in the lemon juice if they’re not mashed. Pack the sweet potatoes into containers -- leaving ½ inch of space at the top -- seal the containers and place them in the freezer. Store them for up to three months.
Christian Killian/Demand Media
Read more :http://www.ehow.com/how_4549051_best-way-store-sweet-potatoes.html